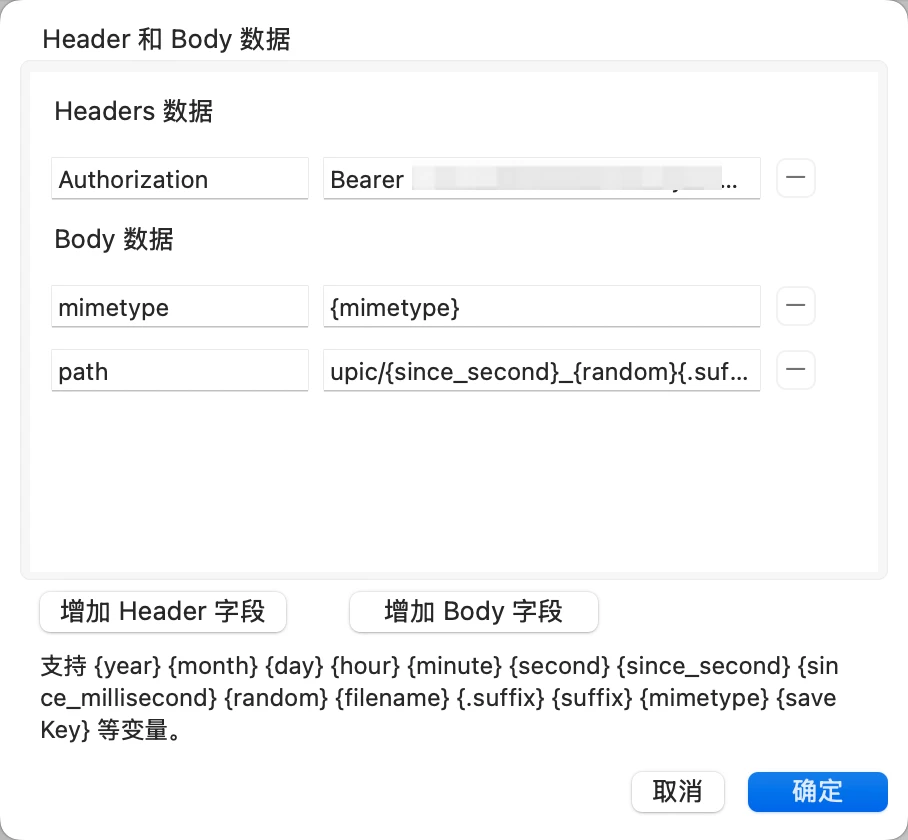
  1
  2
  3
  4
  5
  6
  7
  8
  9
 10
 11
 12
 13
 14
 15
 16
 17
 18
 19
 20
 21
 22
 23
 24
 25
 26
 27
 28
 29
 30
 31
 32
 33
 34
 35
 36
 37
 38
 39
 40
 41
 42
 43
 44
 45
 46
 47
 48
 49
 50
 51
 52
 53
 54
 55
 56
 57
 58
 59
 60
 61
 62
 63
 64
 65
 66
 67
 68
 69
 70
 71
 72
 73
 74
 75
 76
 77
 78
 79
 80
 81
 82
 83
 84
 85
 86
 87
 88
 89
 90
 91
 92
 93
 94
 95
 96
 97
 98
 99
100
101
102
103
104
105
106
107
108
109
110
111
112
113
114
115
116
117
118
119
120
| export default {
async fetch(request, env, ctx) {
// 声明全局变量
let jsonData = null;
// 处理 CORS 预检请求
if (request.method === 'OPTIONS') {
return handleCORS();
}
if (request.method !== "POST") {
return new Response("Only POST allowed", { status: 405 });
}
// 从 Authorization 头部获取 Bearer token
const authHeader = request.headers.get('Authorization') || '';
const token = authHeader.startsWith('Bearer ') ? authHeader.substring(7) : '';
// 验证 token
if (!token || token !== env.AUTH_TOKEN) {
return new Response('Unauthorized', { status: 401 });
}
const contentType = request.headers.get("content-type") || "";
let fileData, fileType, fileName;
// 处理 JSON 格式的请求 (包含 base64 编码的文件数据)
if (contentType.includes("application/json")) {
jsonData = await request.json();
if (!jsonData.file || typeof jsonData.file !== "string") {
return new Response("Invalid file data format", { status: 400 });
}
let base64Data = jsonData.file;
// 检查是否是 data URL 格式
if (jsonData.file.startsWith("data:")) {
// 解析 data URL
const dataUrlParts = jsonData.file.match(/^data:([^;]+);base64,(.+)$/);
if (!dataUrlParts) {
return new Response("Invalid data URL format", { status: 400 });
}
fileType = dataUrlParts[1]; // 例如 "image/png"
base64Data = dataUrlParts[2];
} else {
// 直接使用文件内容,需要从请求或文件名推断类型
fileType = jsonData.mimetype || jsonData.type || jsonData.contentType || "application/octet-stream";
console.log(`[Info] Using MIME type: ${fileType}`);
}
try {
// 将 base64 转换为二进制数据
fileData = Uint8Array.from(atob(base64Data), c => c.charCodeAt(0));
} catch (error) {
return new Response(`Invalid base64 encoding: ${error.message}`, { status: 400 });
}
// 从 MIME 类型生成文件名
const extension = fileType.split('/')[1] || 'bin';
// 使用提供的文件名或生成一个新的
fileName = jsonData.name || jsonData.filename || `${Date.now()}.${extension}`;
}
// 处理 multipart/form-data 格式的请求
else if (contentType.includes("multipart/form-data")) {
const form = await request.formData();
const file = form.get("file"); // 文件字段名为 file
if (!file || typeof file === "string") {
return new Response("No file uploaded", { status: 400 });
}
fileData = file.stream();
fileType = file.type;
fileName = file.name;
}
else {
return new Response("Unsupported content type", { status: 400 });
}
// 使用自定义路径或默认路径
let key;
if (jsonData && jsonData.path) {
key = jsonData.path;
console.log(`[Info] Using custom path: ${key}`);
} else {
const timestamp = Date.now();
key = `uploads/${timestamp}-${fileName || 'file'}`;
console.log(`[Info] Using generated path: ${key}`);
}
console.log(`[Info] Uploading to R2: ${key} (${fileType})`);
const upload = await env.MY_BUCKET.put(key, fileData, {
httpMetadata: {
contentType: fileType || 'application/octet-stream',
},
});
console.log(`[Info] Upload successful`);
const publicURL = `https://${env.PUBLIC_DOMAIN}/${key}`;
console.log(`[Info] Public URL: ${publicURL}`);
// 返回 JSON 对象
return Response.json({ url: publicURL });
},
};
// 处理 CORS 预检请求
function handleCORS() {
return new Response(null, {
headers: {
'Access-Control-Allow-Origin': '*',
'Access-Control-Allow-Methods': 'POST, OPTIONS',
'Access-Control-Allow-Headers': 'Content-Type, Authorization',
'Access-Control-Max-Age': '86400'
}
});
}
|

